How to Override Shopware 6 CMS-Blocks defaultConfig: A Step-by-Step Guide

Shopware 6 is a powerful and open-source e-commerce platform that provides businesses with a variety of tools and features to build and manage their online store. One of these features is the CMS-Blocks functionality, which allows you to add custom content blocks to your online shop.
We already talked about creating CMS-Blocks, creating CMS-Elements and we also talked about CMS-Blocks in the App-System. In this post, we are not going to create anything. We just want to adjust the defaultConfig. Let's do something helpful and remove the default margin from a block!
The plugin base
The base of our plugin is a composer.json and php file. Our composer.json looks like this:
{
    "name": "ninja/cms-block-override",
    "description": "Overriding existings CMS-Blocks example",
    "version": "v1.0.0",
    "type": "shopware-platform-plugin",
    "license": "MIT",
    "authors": [
        {
            "name": "Ninja Army (Joschi Mehta)"
        }
    ],
    "require": {
        "shopware/core": "*",
        "shopware/administration": "*",
        "shopware/storefront": "*"
    },
    "extra": {
        "shopware-plugin-class": "NINJA\\CmsBlockOverride\\CmsBlockOverride",
        "copyright": "(c) Ninja Army",
        "label": {
            "de-DE": "CMS Block überschreiben Beispiel",
            "en-GB": "CMS Block override Example"
        }
    },
    "autoload": {
        "psr-4": {
            "NINJA\\CmsBlockOverride\\": "src/"
        }
    }
}
And of course, the generated PHP file:
<?php declare(strict_types=1);

namespace NINJA\CmsBlockOverride;

use Shopware\Core\Framework\Plugin;

class CmsBlockOverride extends Plugin {

}
To get started have a look at the official Shopware documentation. Now that we have our plugin base we can start to code!
Overriding the Shopware 6 text CMS-Block
To override an existing CMS-Block we first need to recreate the directory structure. Let's create Resources/app/administration/src/module/sw-cms/blocks/text/text.
Removing default margin
In that directory we place an index.js file:
let config = Shopware.Service('cmsService').getCmsBlockConfigByName('text');

// Change the config here
config.defaultConfig = {
    marginBottom: '',
    marginTop: '',
    marginLeft: '',
    marginRight: ''
}

Shopware.Service('cmsService').registerCmsBlock(config);
Now we got the default config from the text block and we changed the config values.
Loading the CMS-Block
We need to go back to the blocks directory and place an index.js here as well.
import './text/text';
An import is enough in that file. If you want to override more CMS-Blocks make sure to import all blocks in that file.
As you may remember from the Shopware Documentation we need a main.js in the administration direcotry as the main entry point.
import './module/sw-cms/blocks';
Building the administration
The only thing we need to do now is to build the administration. While writing this blog post it is possible with ./psh.phar administration:build. If this is not working anymore you may want to have a look at the CMS Block Documentation.
The Result
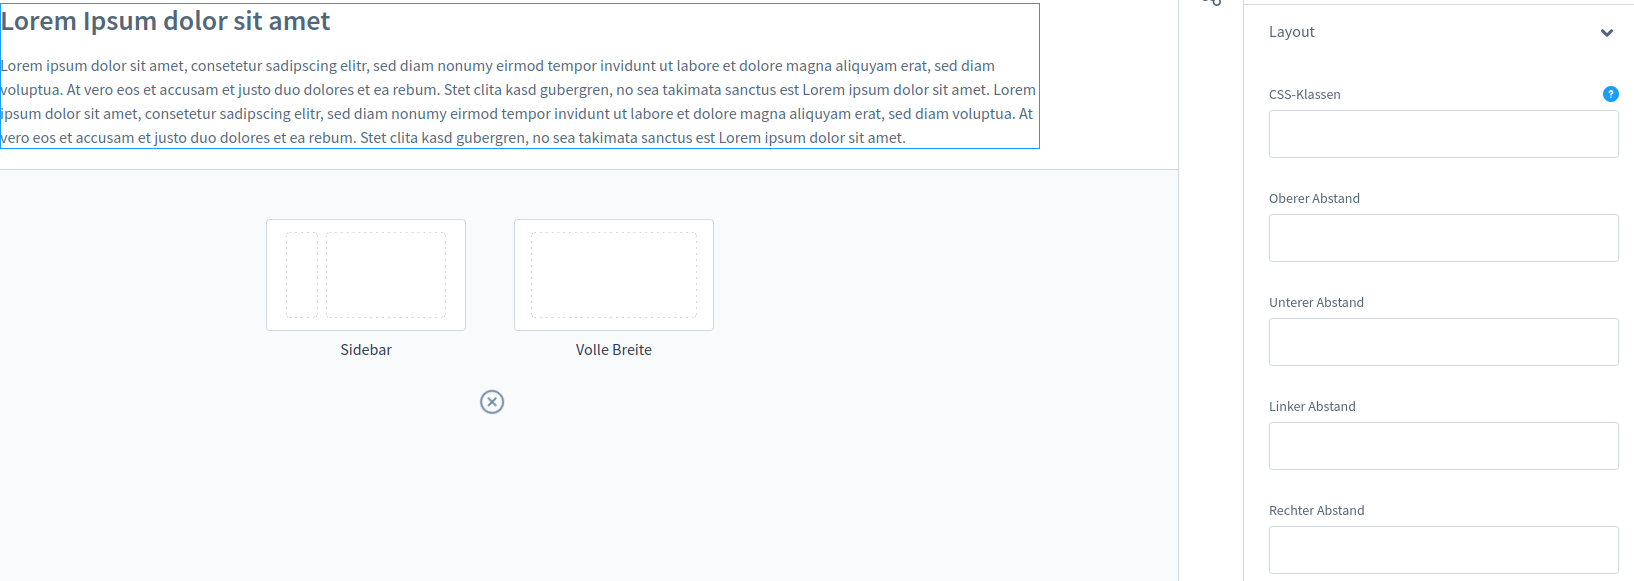
I dragged the text element into the shopping experience. On the right side, you see the default config. All fields are empty now. That's what we did!
Conclusion
Overriding CMS Blocks is possible and we don't need much to do it. Sometimes it's the best solution to override those blocks. I like the way Shopware 6 works. It's easy to adjust and you can do a lot of things fast.
The Code
You can find the code on my GitHub. Take a look at it, use it and adjust it to your needs!


