


We successfully created a CMS-Block and a CMS-Element in the Shopware 6 Plugin-System. Now let's take a look at the Shopware 6 App-System and how easy it is to create a CMS-Block here.
The App Concept
Apps work different than plugins. You can read the concept at the offical documentation of Shopware 6. Unfortunately an app can not do everything a plugin can. At the moment it's not possible to create a CMS-Element within the app-system.
However this feature will be released soon. Take a look at the Shopware Admin SDK documentation for more information on this.
CMS-Block in an app - Overview
The structure of a CMS-Block in an app is completely different. The offical documentation is pretty good, so I recommend to take a look at it.
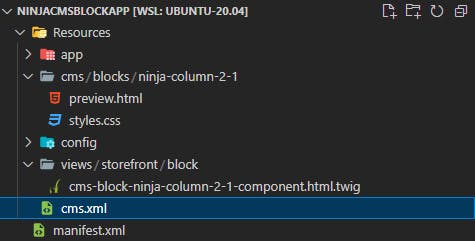
We only need to create the files you see in the picture above. So creating a CMS-Block in the app-system is much easier and a lot faster. We just have a couple of files to create right? There are also some limitation so we can't use Twigor Sass/scss in the administration.
Since we can only do CMS-Blocks and not CMS-Elements let's actually do something useful. The CMS-Block works as a outer wrapper as you may remember. So let's create a simple layout block. We are going to create a layout block which doesn't exist yet. At the end we will have a block with 2 columns. The left column has about 66,66% (2/3) width/space and the second column about 33,33% (1/3). Let's hop into the code!
The start of every app - manifest.xml
You already can do a lot of things with apps. Make sure to take a look at theApp Base Guide to learn about it. For now we only need the manifest.xml file to create our first app, install it and activate it.
So let's take a look at how a basic manifest.xml could look like. Place it into <app-root>/
<?xml version="1.0" encoding="UTF-8"?>
<manifest xmlns:xsi="http://www.w3.org/2001/XMLSchema-instance" xsi:noNamespaceSchemaLocation="https://raw.githubusercontent.com/shopware/platform/trunk/src/Core/Framework/App/Manifest/Schema/manifest-1.0.xsd">
    <meta>
        <name>NINJACmsBlockApp</name>
        <label>CMS Block App Example</label>
        <label lang="de-DE">CMS Block App-Beispiel</label>
        <description>CMS Block Example</description>
        <description lang="de-DE">CMS Block Beispiel</description>
        <author>Joschi</author>
        <copyright>(c) by Ninja Army</copyright>
        <version>1.0.0</version>
        <license>MIT</license>
        <icon>Resources/config/plugin.png</icon>
    </meta>
</manifest>
That's all you need! The only important thing is that the name matches the name of the parent directory. So our app is placed in a directory which is called NINJACmsBlockApp.
Now we also need to create the Resources directory and place the rest of the files in there. You already can install and activate your app now! We move on by defining our CMS-Blocks.
Defining Blocks - cms.xml
Defining CMS-Blocks in apps works completely different than in plugins. Luckily it's pretty simple to create CMS-Blocks in an app. We can define our blocks in a simple cms.xml file. We place this file into the <app root>/Resources/ In the plugin we had slots for the elements and a lot of files and directories. Take a look how it's done in an app:
<?xml version="1.0" encoding="utf-8" ?>
<cms xmlns:xsi="http://www.w3.org/2001/XMLSchema-instance" xsi:noNamespaceSchemaLocation="https://raw.githubusercontent.com/shopware/platform/trunk/src/Core/Framework/App/Cms/Schema/cms-1.0.xsd">
    <!-- IMPORTANT SLOTS ARE SORTED APLPHABETICALLY NO DOCS ON THIS!! -->
    <blocks>
        <!-- 2-1 Grid ALPHABETICAL -->
        <block>
            <name>ninja-column-2-1</name>
            <category>text</category>
            <label>2-1 from Tablet (md)</label>
            <label lang="de-DE">2-1 ab Tablet (md)</label>

            <slots>
                 <slot name="columnLeft" type="text">
                    <config>
                        <config-value name="vertical-align" source="static" value="top"/>
                    </config>
                </slot>

                <slot name="columnRight" type="text">
                    <config>
                        <config-value name="vertical-align" source="static" value="top"/>
                    </config>
                </slot>
            </slots>

            <default-config>
                <margin-top>20px</margin-top>
                <margin-right>20px</margin-right>
                <margin-bottom>20px</margin-bottom>
                <margin-left>20px</margin-left>
                <sizing-mode>boxed</sizing-mode>
            </default-config>
        </block>
    </blocks>
</cms>
We have to define the name , category , label , and the slots. Of course we also can define the default-config in the cms.xml. Now we almost have everything we need.
Block preview
Creating the preview for the administration is pretty easy in apps. Important here is that you know the name of your block. The name of the block is also defined in the cms.xml. So if you are not sure how your block is called take a look at the cms.xml again.
The following directory structure <app-root>/Resources/cms/blocks/ is where we create folders for our blocks. In this case I create a folder ninja-column-2-1 here, because I named the block like this. Now we have <app-root>/Resources/cms/blocks/ninja-column-2-1/. That's the place for our preview.html and styles.css.
The files have to be named exactly like that and in the correct directory to work. Let's take a look at a simple preview.html first:
<div class="sw-cms-preview-block-ninja-column-layout-2-1">
    <div class="sw-cms-preview-block-ninja-columns-2-1">
        <div></div>
        <div></div>
    </div>
</div>
Now we only have a couple of divs with no content. We want to create a layout block, in that you can place any element. So we just have to style the divs to make them look like a container. For that we have our styles.css
.sw-cms-preview-block-ninja-column-layout-2-1 {
    display: flex;
    justify-content: center;
}
.sw-cms-preview-block-ninja-columns-2-1 {
    display: grid;
    grid-gap: 15px;
    grid-template-columns: 2fr 1fr;
    width: 100%;
    margin: 0.5rem;
    grid-template-rows: 50px;
}
.sw-cms-preview-block-ninja-columns-2-1 > div {
    border: 2px dashed #1c43a3;
    background-color: rgba(28,67,163,0.1);
}
.sw-cms-block-ninja-column-2-1-component {
    grid-template-columns: 2fr 1fr;
    display: grid;
    grid-gap: 15px;
}
I use grid in that example but feel free to do the css in any way you like. At that point we are almost done with our CMS-Block in the app-system.
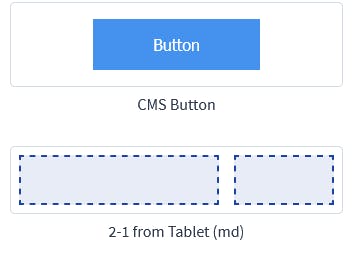
The CMS-Block now appears in the administration, in the category text. Maybe you need to deinstall and install the app again to see changes.
Now we made a app with 2 columns and we can change the elements in the block like we want. The only thing we need to do is the storefront.
Storefront
The storefront implementation almost works the same as in plugins. So all we need to do is to create the directory <app-root>/Resources/views/storefront/block/. In this directory you can place all your blocks. Now the important thing in the app-system is that you have to name your block a little different. In our case it would becms-block-ninja-column-2-1-component.html.twig. So we have to ad the -component to the filename.
Now our file looks pretty simple because we want every element to fit into the block right? It looks like this:
{% block ninja_column_1_3 %}
    {% set columns = 2 %}
    <div class="ninja-grid-layout ninja-grid-layout-2-1">
        {% block block_ninja_column_left %}
            {% set element = block.slots.getSlot('columnLeft') %}

            <div data-cms-element-id="{{ element.id }}">
                {% block ninja_column_left_inner %}
                    {% sw_include "@Storefront/storefront/element/cms-element-" ~ element.type ~ ".html.twig" ignore missing %}
                {% endblock %}
            </div>
        {% endblock %}

        {% block block_ninja_column_right %}
            {% set element = block.slots.getSlot('columnRight') %}

            <div data-cms-element-id="{{ element.id }}">
                {% block ninja_column_right_inner %}
                    {% sw_include "@Storefront/storefront/element/cms-element-" ~ element.type ~ ".html.twig" ignore missing %}
                {% endblock %}
            </div>
        {% endblock %}
    </div>
{% endblock %}
We defined the two slots in the cms.xml and now we render our content in that slots. The frontend will now actually display our content! We should add a bit of css for the frontend as well.
SCSS for the frontend
This part works exactly the same like in plugins. Let's simply create <app-root>/Resources/app/storefront/src/scss and create a simple base.scss.
Now our scss could look like this:
@include media-breakpoint-up(md) {
    .ninja-grid-layout {
        display: grid;
        grid-gap: 20px;
        width: 100%;
        padding: 20px;
        margin: auto;
        &-2-1 {
            grid-template-columns: 2fr 1fr;
        }
    }
}
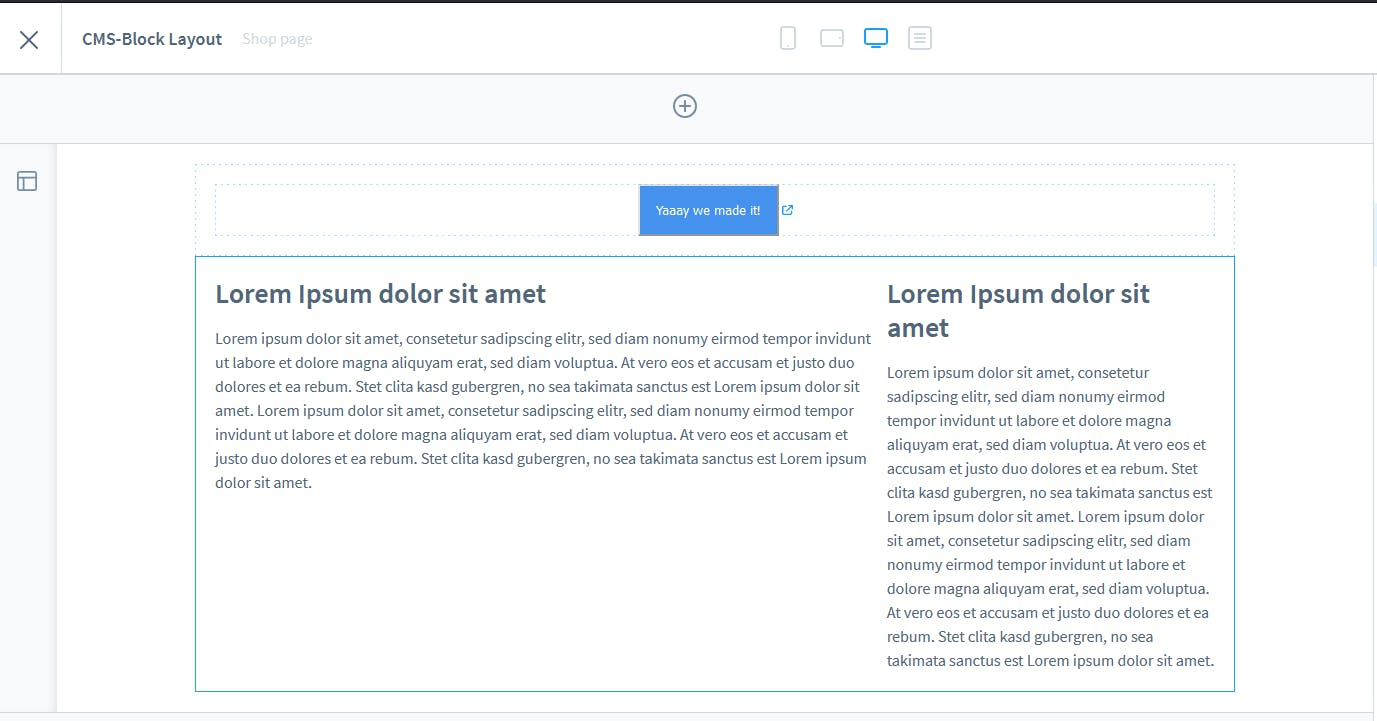
In this little app, I decided that I only want to have two columns from tablet. So on mobile we will actually see the content rendered underneath each other. Just feel free to do whatever you'd like to do! Our frontend looks like this now:
We created a simple CMS-Block layout and we now can change the elements within this block. The best thing is that we also can place elements in that CMS-Block which come from different plugins. So that's pretty cool! You can also find a complete CMS-Grid App in the Shopware Store.
Creating CMS-Elements within the App-System
Creating real CMS-Elements in the app-system is not working yet. If you still want to create CMS-Elements you have to use the plugin structure.
Is there a workaround?
Most of the time you always find a workaround right? In the app-system, there actually also is a workaround but it's pretty bad. Now what you can do is use the app configuration as the CMS-Element configuration.
So let's say you want to create a simple button that you can configure. What you need to do is to create the CMS-Block and put the configuration into the app configuration. Now you got a couple of problems. The first problem would be that you can not place your CMS-Element into the slot because it's not existing. You need to use a different element for example the text element and you just render a button in the frontend. It's actually the same we did in the CMS-Block Tutorial
You now created a configurable button but nobody can see it in the backend. That's bad already! Another problem you would face is that you only can create one button. Of course, you could use the button as many times as you want but they all would look the same. You have the app configuration which basically is used for every CMS-Block you use. The workaround here would be to create different CMS-Blocks for different buttons but this would also be bad..
The workaround is probably only good for simple CMS-Elements but I still highly recommend using the plugin-system. Take a look at the How to create a CMS-Element Guide
Github
If you just want to take a look at the code or if you want to clone the repository then just checkout the project on github.